
상똥이의 Back-End 공부방
[Nest.js, AWS S3] S3 버켓에 이미지 업로드하기 본문
목표
- 서버에서 이미지를 업로드하면
- 이미지를 AWS S3에 업로드하고 저장한다
- AWS S3에서 이미지를 조회할 수 있도록 한다
목차
0. S3 버켓을 사용하는 이유
1. S3 버켓 생성 및 사용자 생성
2. S3를 사용하기 위한 로직 구현
3. 이미지 업로드 로직 구현
4. 이미지 업로드 후 AWS에서 이미지 확인
0. S3 버켓을 사용하는 이유
- 데이터베이스의 성능 저하 : 이미지를 데이터베이스에 저장하면, 데이터베이스의 성능이 크게 영향을 받음 / 이미지 파일은 일반적으로 큰 용량을 차지하므로, 데이터베이스가 많은 이미지 데이터를 처리하려면 상당한 디스크 공간과 I/O 성능이 필요 / 이로 인해 데이터베이스의 쿼리 성능이 저하되고, 전체 시스템의 응답 속도가 느려짐
- 보안 취약성 : 서버의 public 디렉토리에 이미지를 저장하면, 해당 이미지에 대한 접근이 공개적으로 열려있을 수 있음 -> 이는 이미지에 대한 무단 접근과 잠재적인 보안 문제를 초래할 수 있으며, 민감한 정보를 포함할 수 있는 이미지의 경우 특히 위험할 수 있음
1. S3 버켓 생성 및 사용자 생성
(1) S3 버켓 생성
- aws 검색란에 S3 검색
- S3 화면으로 들어가 버킷 만들기 클릭
- 일반 구성: 이름 설정
- 객체 소유권: ACL 비활성화
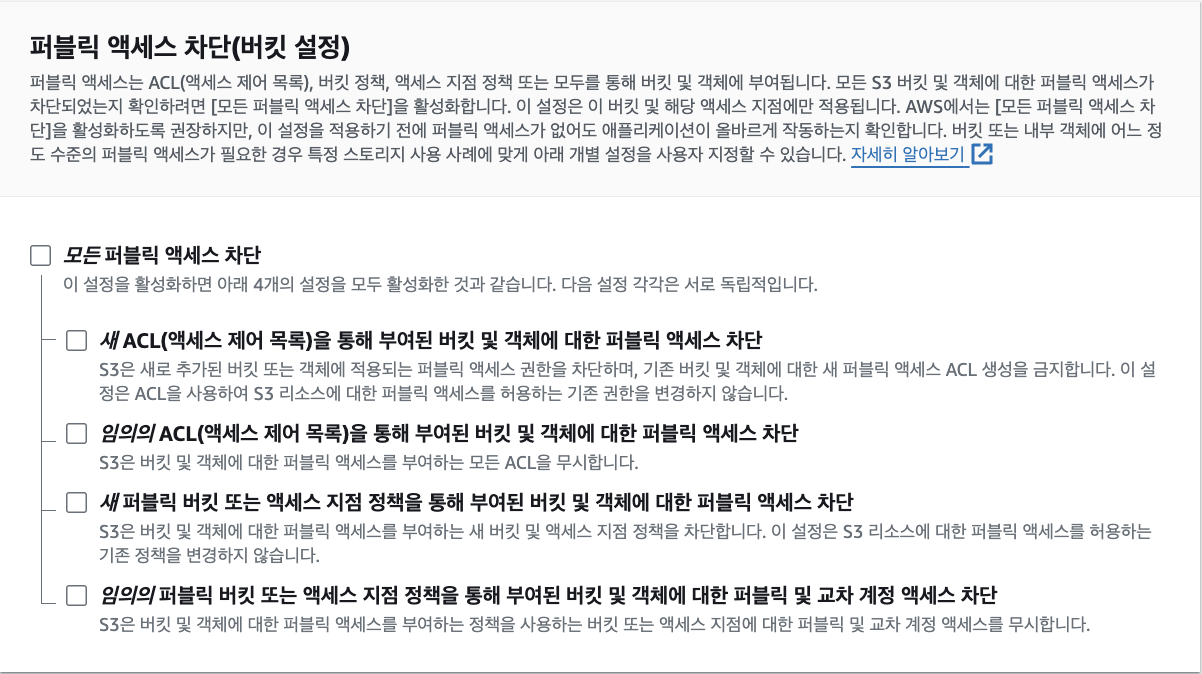
- 퍼블릭 엑세스 차단 설정: 모든 퍼블릭 액세스 차단 비활성화
- 기본 암호화: Amazon S3 관리형 키(SSE-S3)를 사용한 서버 측 암호화
- 고급 설정: 객체 잠금 비활성화
- 버킷 만들기 클릭
(2) 버켓 권한 편집
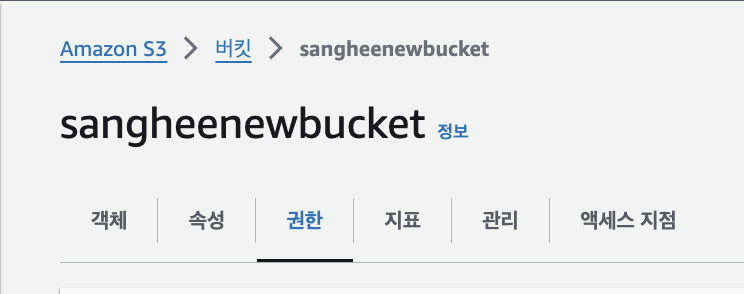
- 생성한 버켓 선택 후 권한으로 이동
- '버킷 정책'을 아래처럼 설정 (권한에 대한 자세한 내용은 여기 참고)
{
    "Version": "2012-10-17",
    "Statement": [
        {
            "Sid": "Statement1",
            "Effect": "Allow",
            "Principal": "*", //모두
            "Action": "s3:ListBucket", //객체를 볼 수 있음
            "Resource": "arn:aws:s3:::버켓이름"
        },
        {
            "Sid": "Statement2",
            "Effect": "Allow",
            "Principal": "*", //모두
            "Action": "s3:GetObject",  //객체를 다운로드할 수 있음
            "Resource": "arn:aws:s3:::버켓이름/*"
        }
    ]
}
(3) 사용자 생성
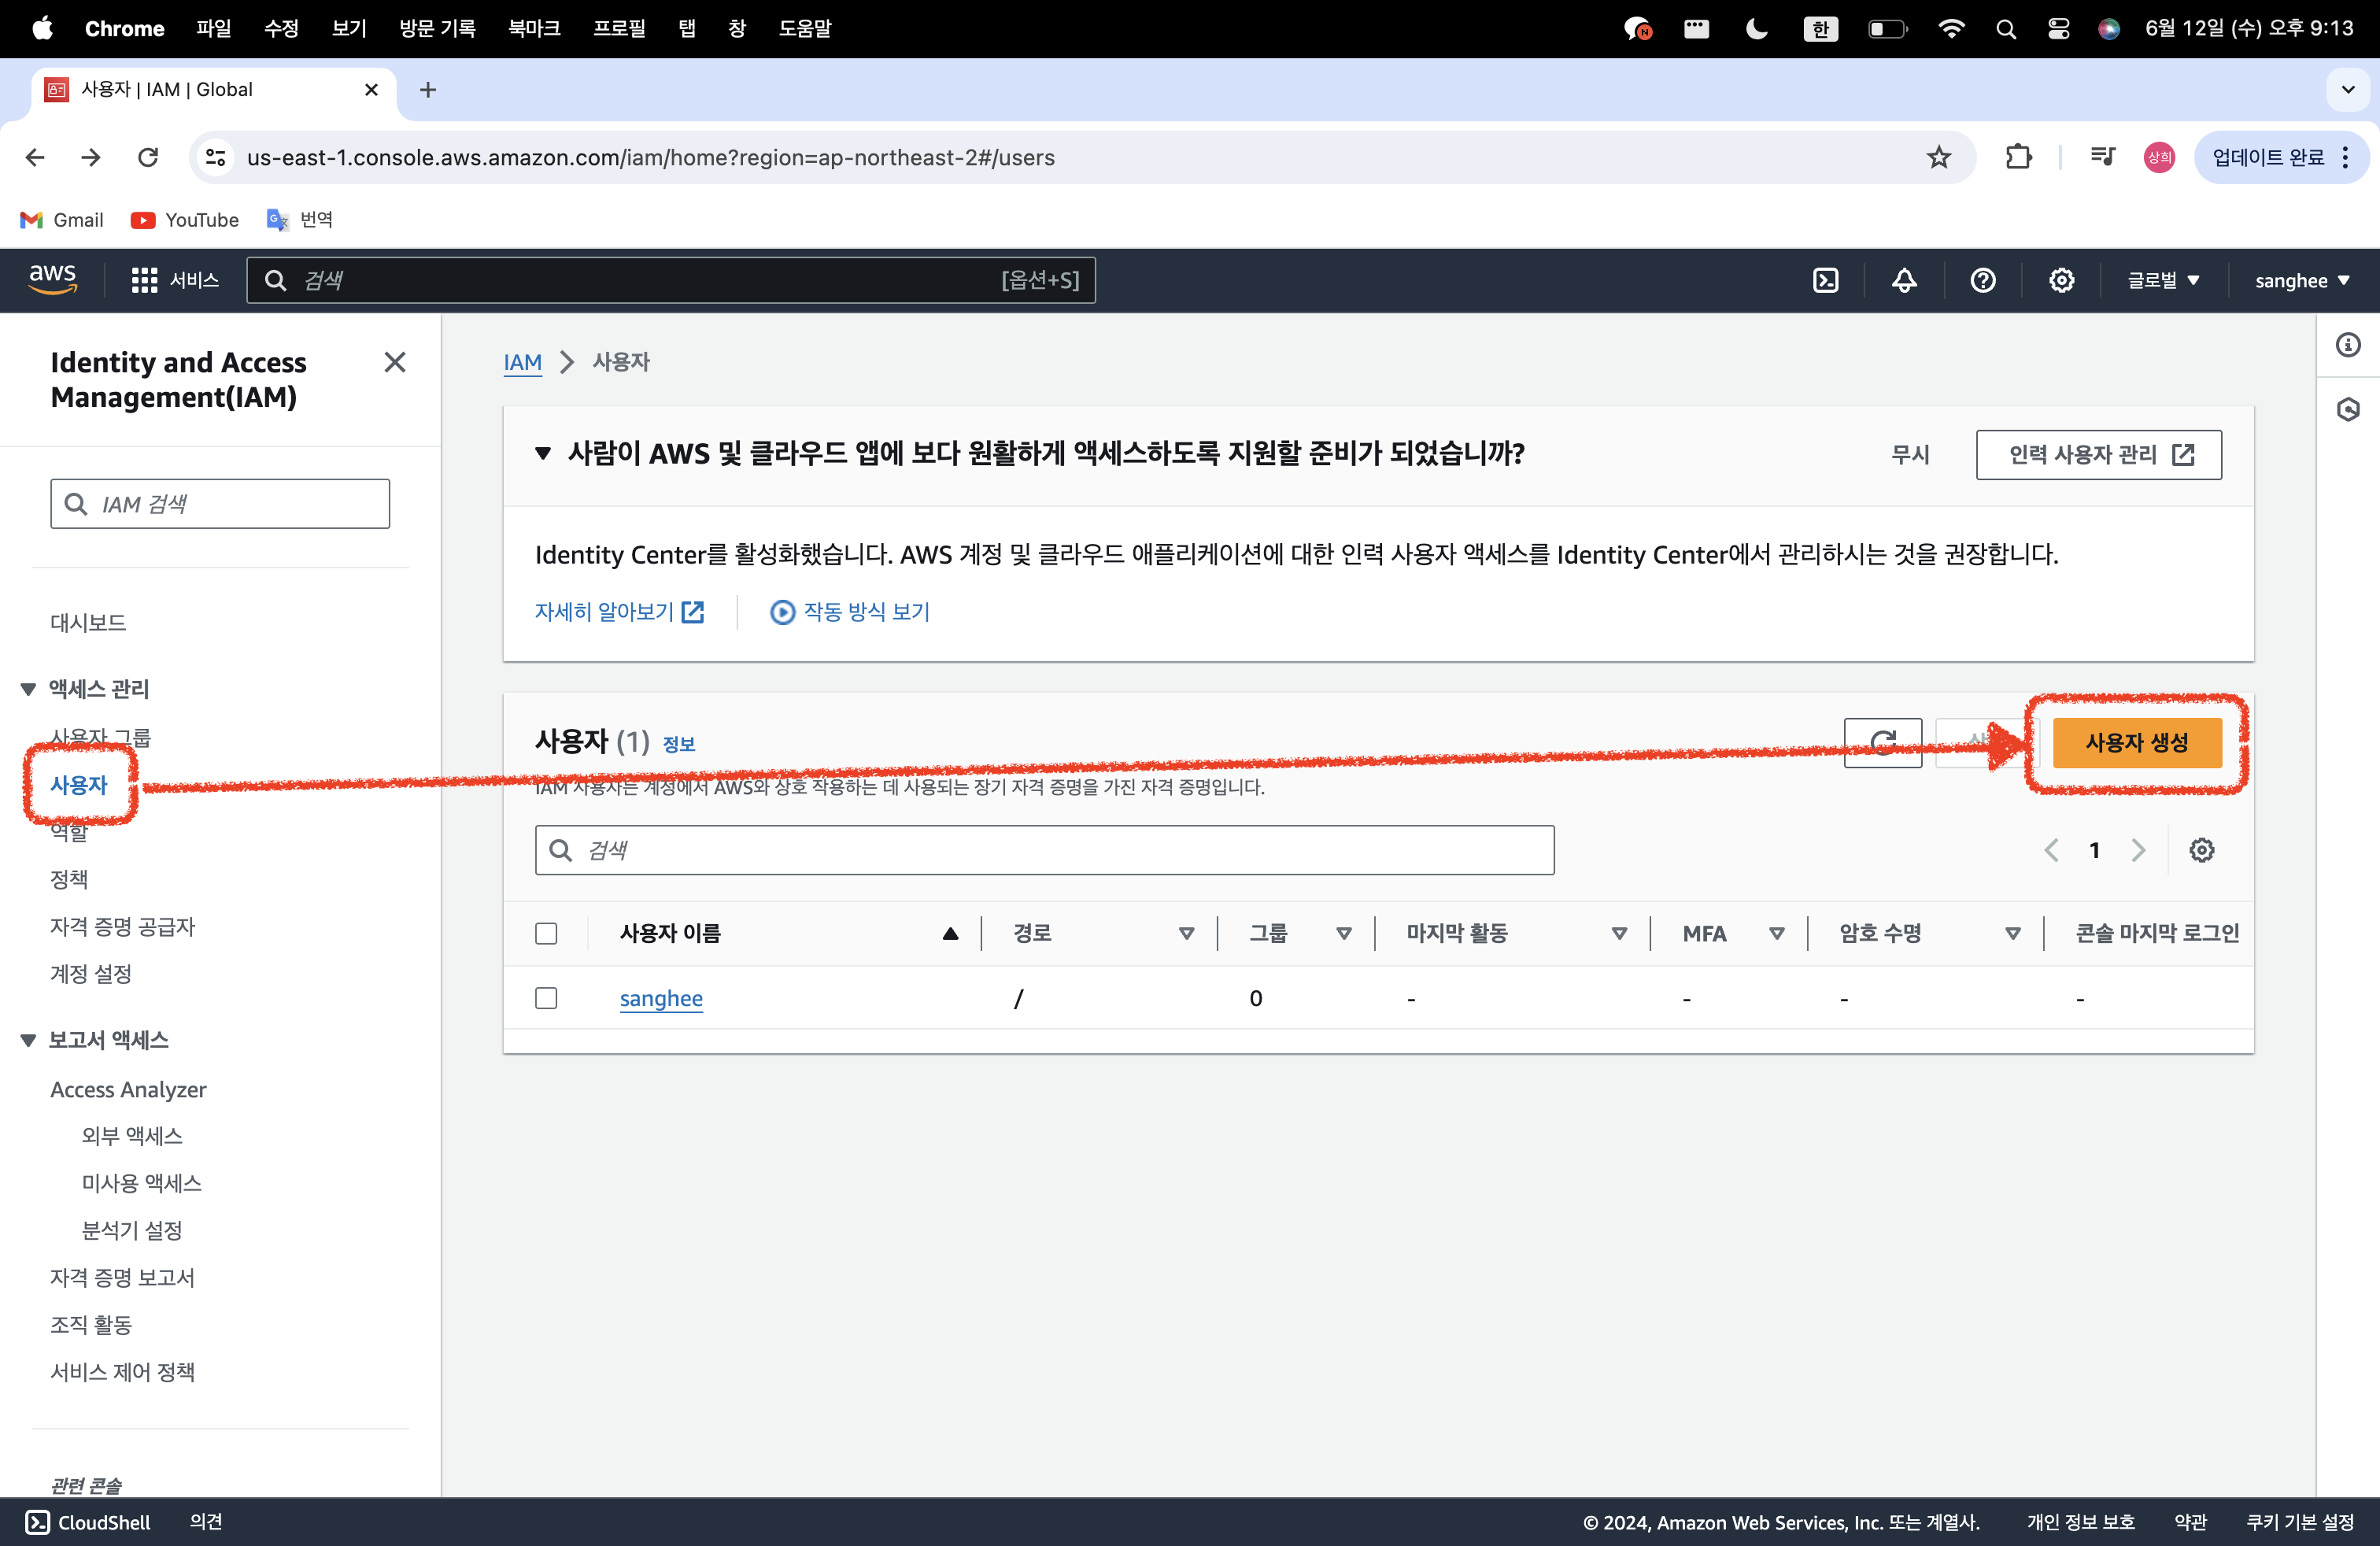
- aws 검색란에 IAM 검색
- IAM → 사용자 → 사용자 생성 클릭
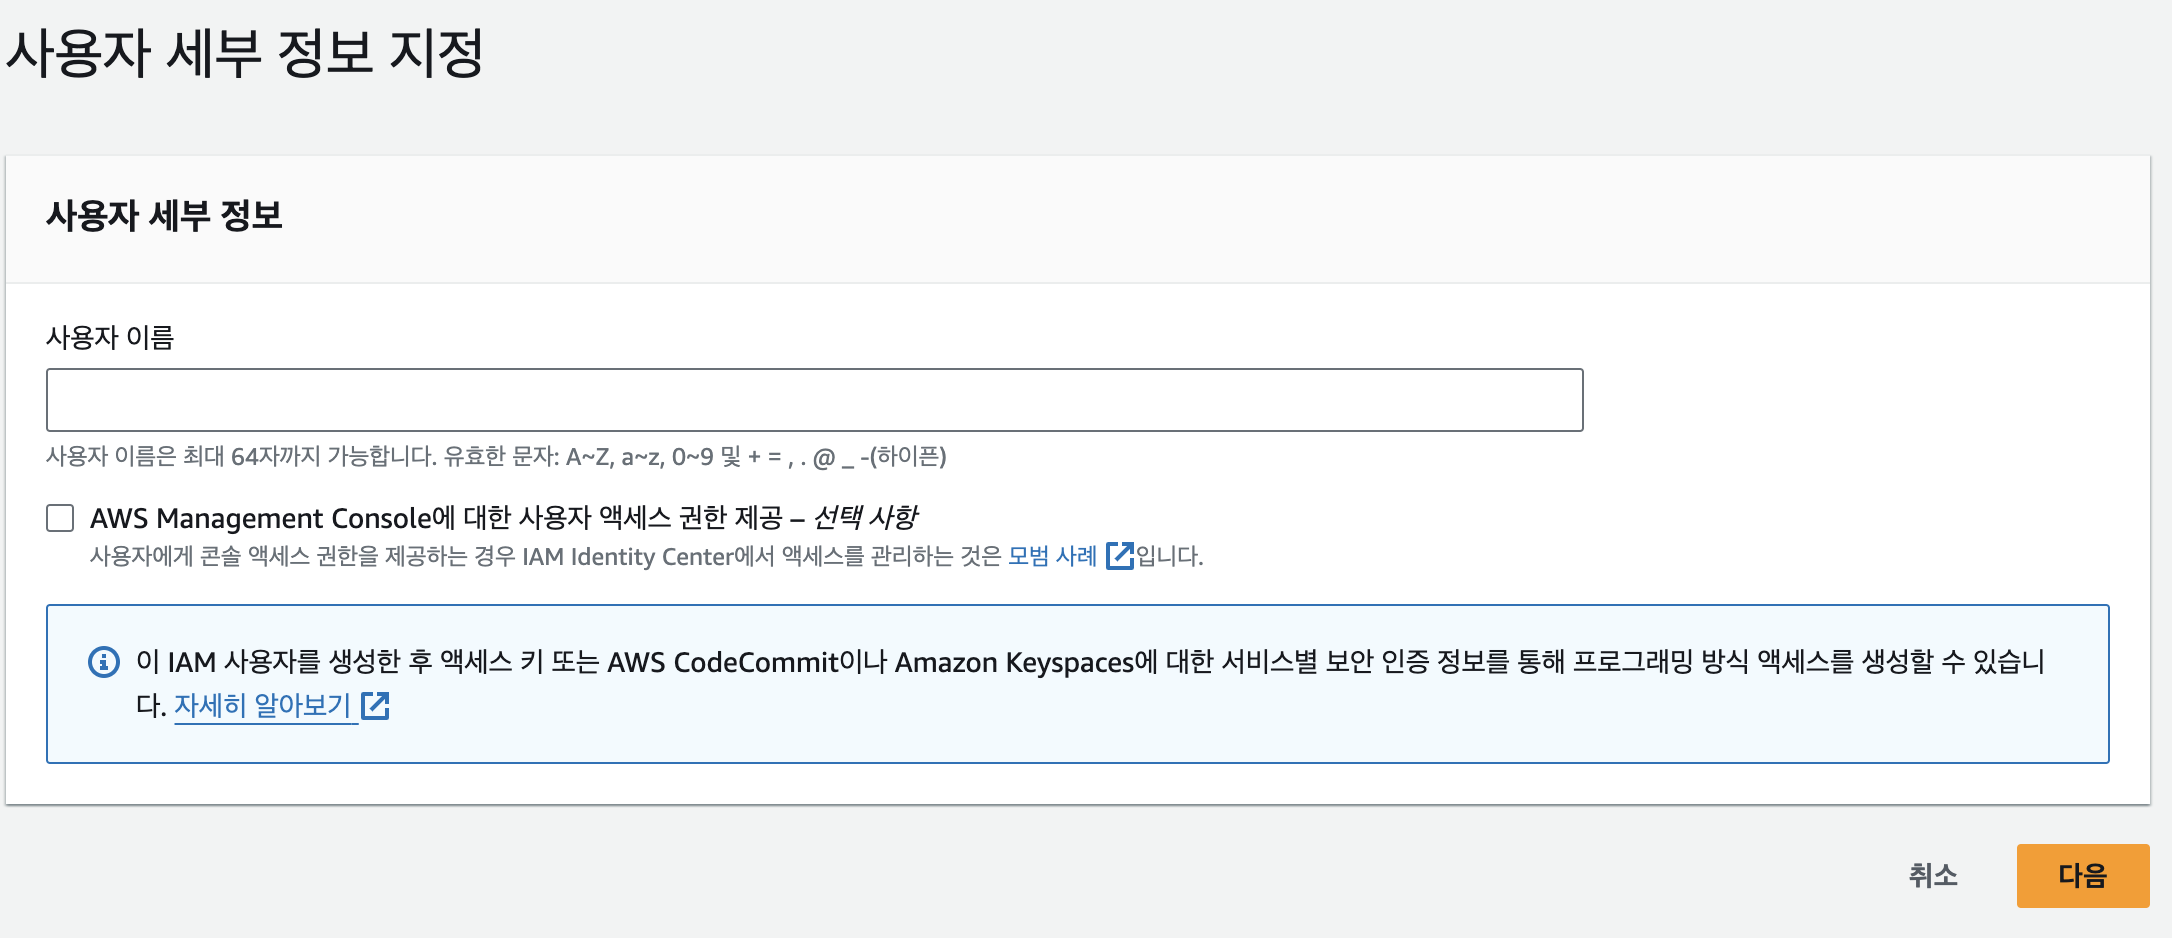
- 사용자 이름 지정
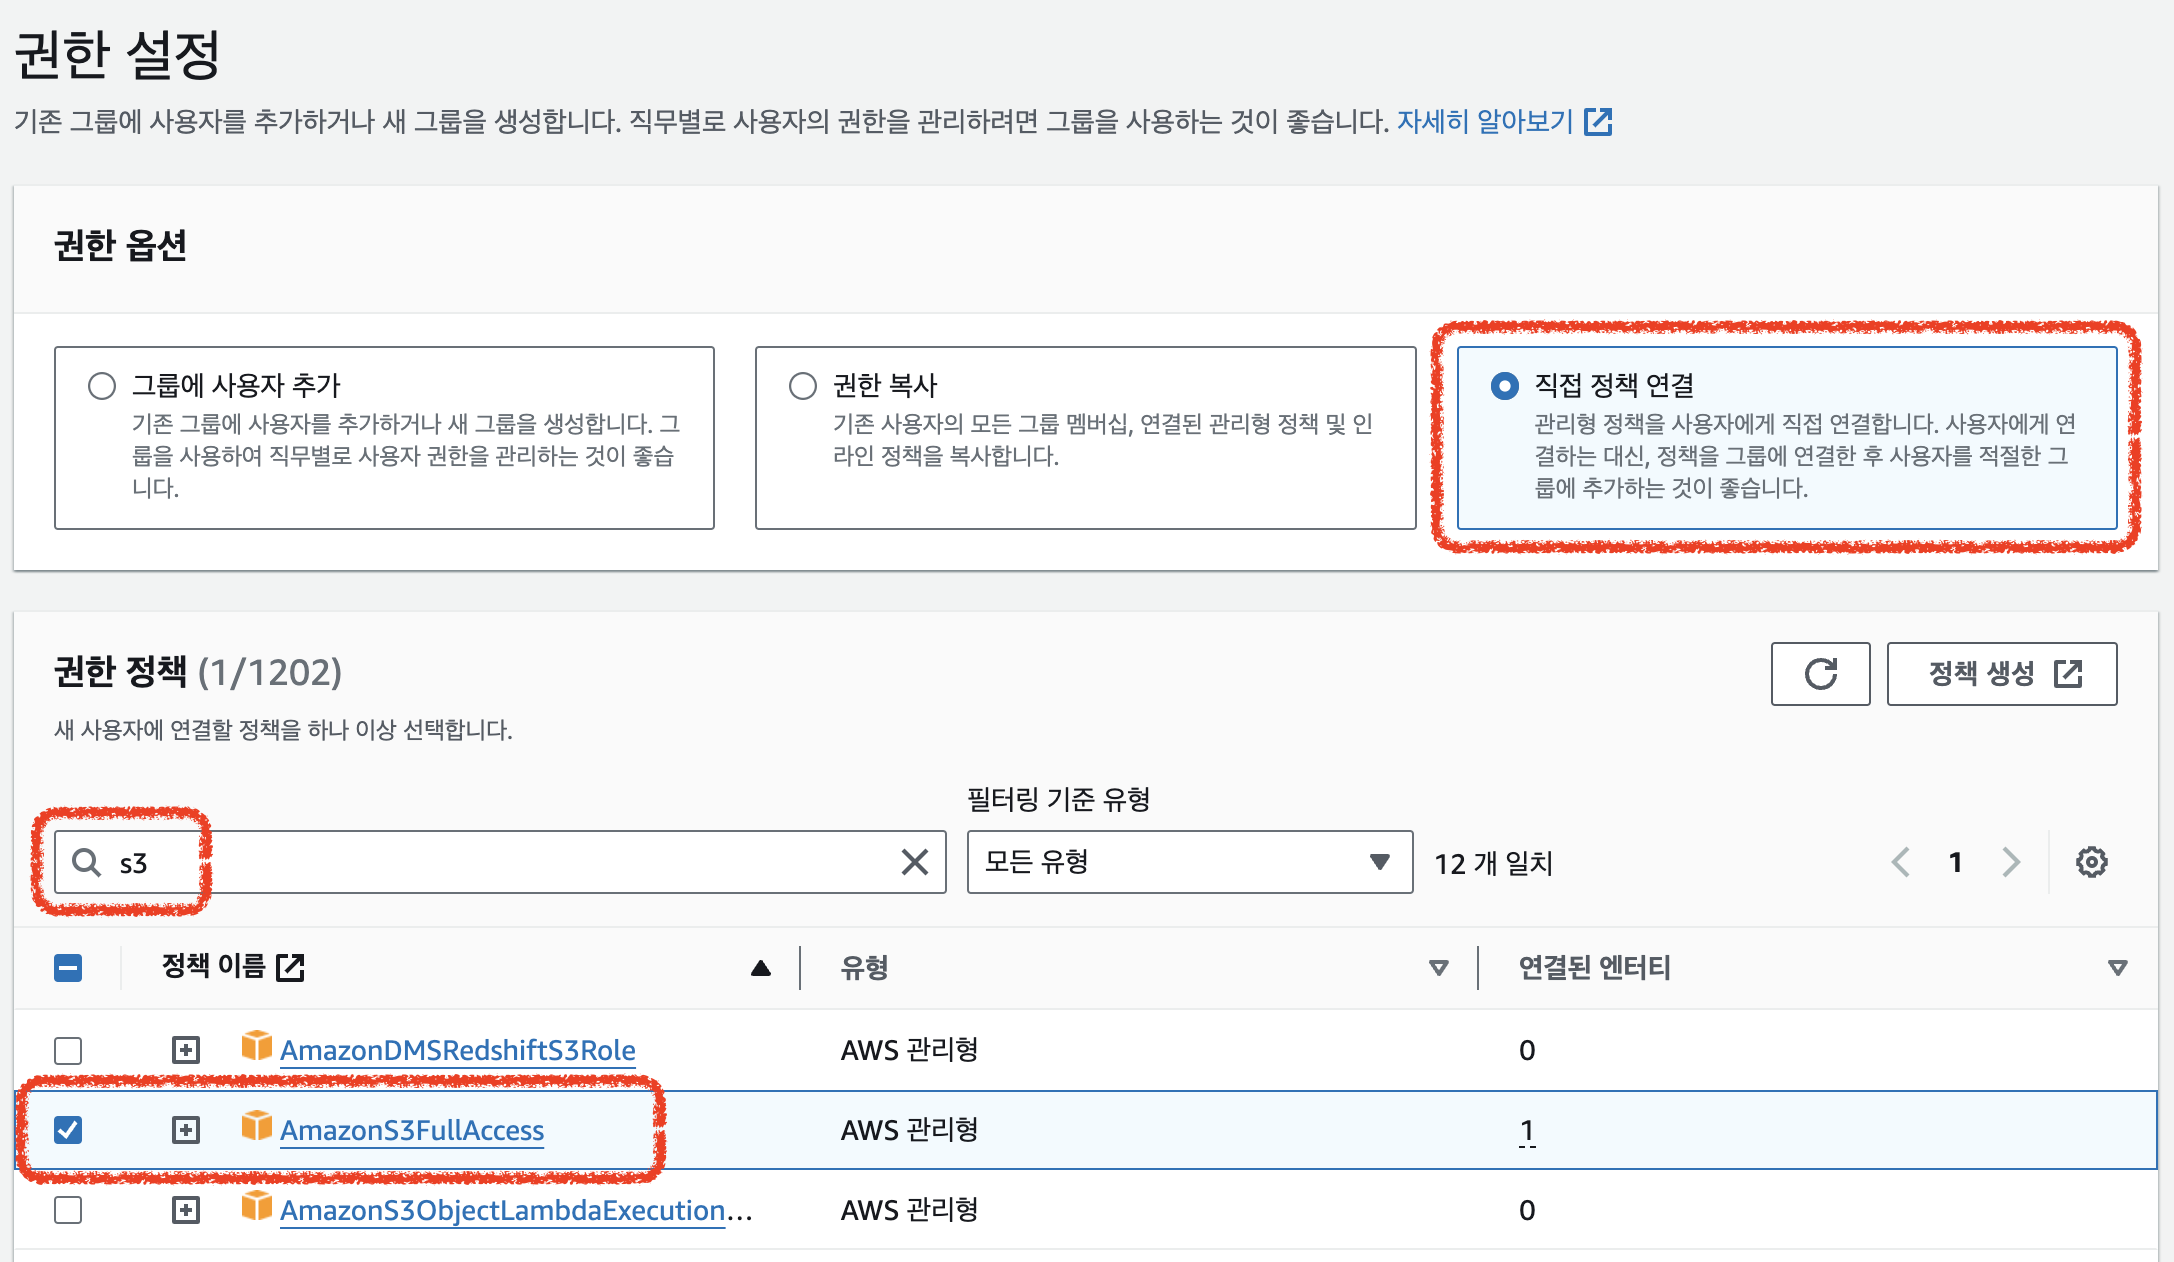
- 권한 설정 시 '직접 정책 연결' 선택
- 권한 정책에 'AmazonS3FullAccess' 선택
- 사용자 생성 클릭
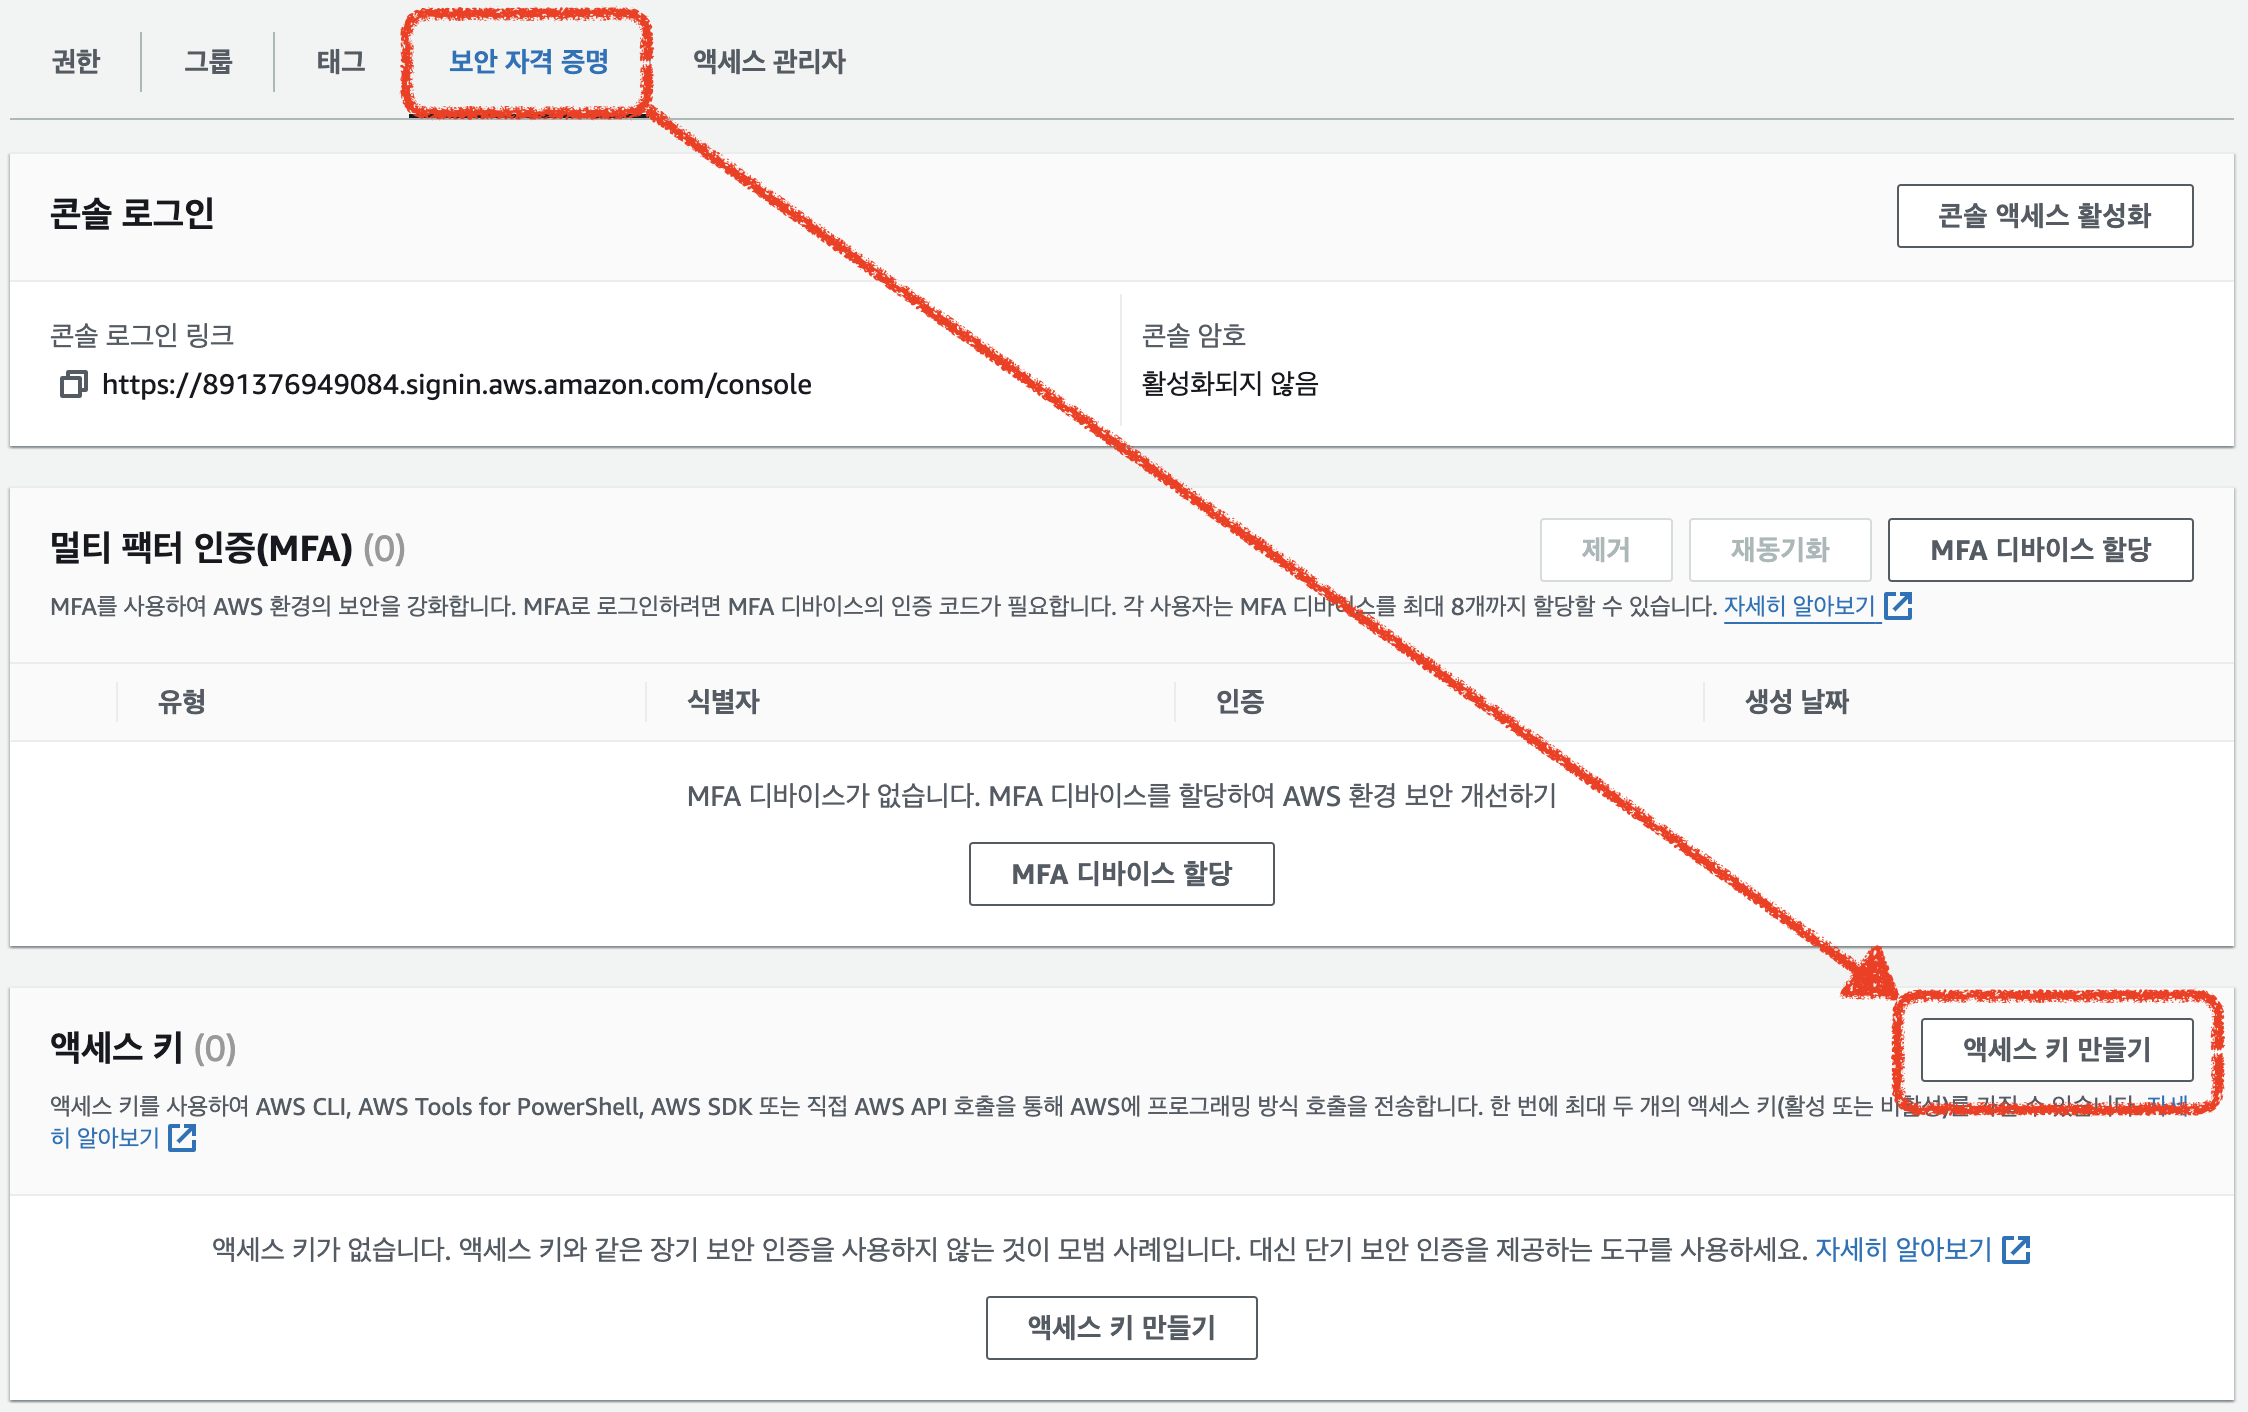
- 사용자 목록에서 새로 생성한 사용자 클릭 → '보안 자격 증명' 탭으로 이동
- '액세스 키 만들기' 클릭
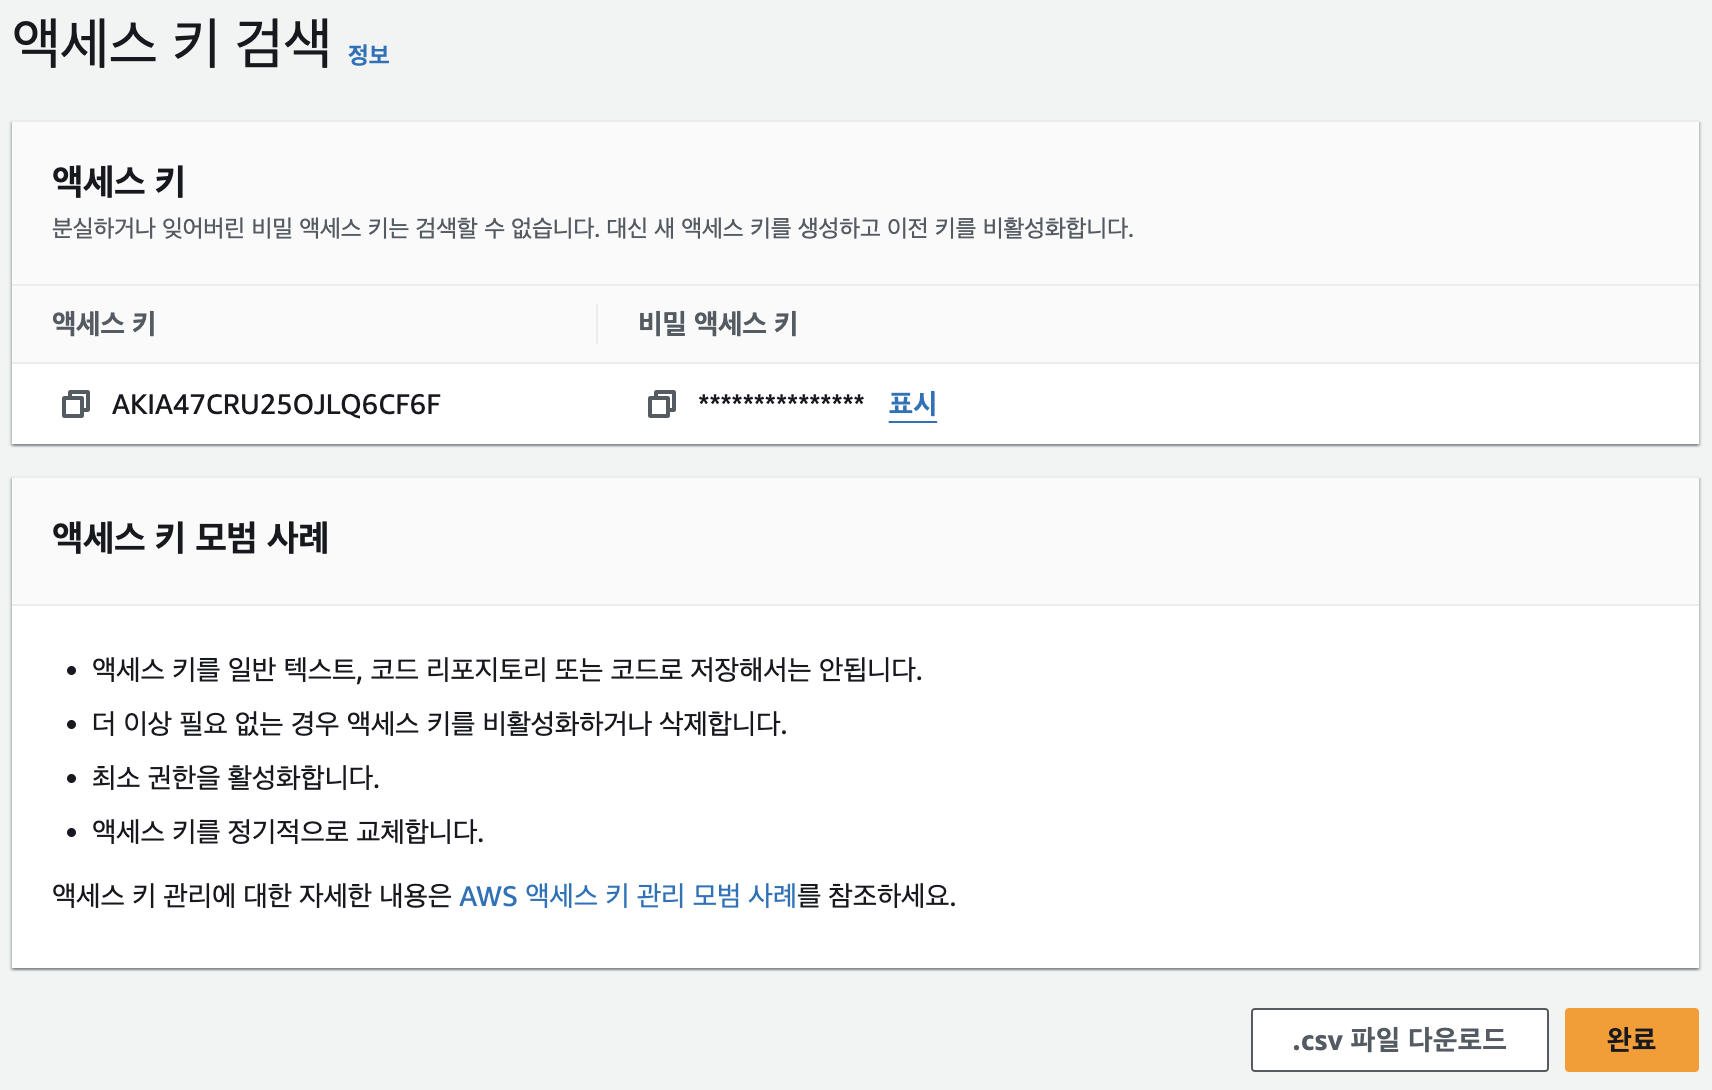
- 'AWS 외부에서 실행되는 애플리케이션' 선택 후 다음 클릭
- '액세스 키 만들기' 클릭
- '액세스 키'와 '비밀 액세스 키'가 생성됨 (csv다운로드 눌러서 비밀 액세스 키 잃어버리지 않도록 하기)
2. S3를 사용하기 위한 로직 구현
(1) .env파일 설정
- 아래처럼 생성
/* .env */
/*S3 버켓 및 사용자 설정*/
AWS_REGION= 버켓 리전 설정
AWS_ACCESS_KEY_ID= 발급받은 액세스 키
AWS_SECRET_ACCESS_KEY= 발급받은 비밀 액세스 키
AWS_S3_BUCKET_NAME= 버켓 이름
(2) s3로직 구현
- 필요한 라이브러리를 모두 설치
npm i @types/express @types/multer @nestjs/config @aws-sdk/client-s3 multer-s3 nanoid@^3.0.0- src 아래에 utils 폴더 생성하고, 그 안에 file.util.ts 생성
//file.util.ts

import { S3Client } from '@aws-sdk/client-s3';
import { ConfigService } from '@nestjs/config';
import * as multerS3 from 'multer-s3';
import { nanoid } from 'nanoid';

export function setupMulterS3(configService: ConfigService) {
  // configService를 사용해 .env파일에서 aws 사용자와 s3버켓 정보를 가져온다.
  const bucketName = configService.get('AWS_S3_BUCKET_NAME');
  const region = configService.get('AWS_REGION');
  const accessKeyId = configService.get('AWS_ACCESS_KEY_ID');
  const secretAccessKey = configService.get('AWS_SECRET_ACCESS_KEY');

  // S3Client 설정: Amazon S3와 상호작용할 수 있도록 함
  // region: S3 버킷이 위치한 AWS 리전, 올바른 위치 설정은 지연 시간을 줄임
  // credentials: 세부 정보
  const s3 = new S3Client({
    region: region,
    credentials: {
      accessKeyId: accessKeyId,
      secretAccessKey: secretAccessKey,
    },
  });

  // multerS3: multer와 통합된 S3저장소 엔진 (multer: Node.js에서 파일 업로드를 처리하는 미들웨어)
  // s3: AWS S3와 상호작용
  // bucket: 파일을 저장할 S3 버킷의 이름을 지정
  // key: 업로드된 파일이 s3에 저장될 때의 파일명을 정의, 파일 업로드 시 호출
  const storage = multerS3({
    s3: s3,
    bucket: bucketName,
    key: function (file, cb) {
      cb(null, `${nanoid()}-${file.originalname}`);
    },
  });

  return {
    storage: storage,
  };
}
- src 아래에 storage라는 폴더를 생성하고, 그 안에 s3.module.ts, s3.service.ts 생성
// s3.module.ts

import { Module } from '@nestjs/common';

import { ConfigModule } from '@nestjs/config';
import { S3Service } from './s3.service';

@Module({
  imports: [ConfigModule],
  providers: [S3Service],
})
export class S3Module {}
// s3.service.ts
import { PutObjectCommand, S3Client } from '@aws-sdk/client-s3';
import { Injectable } from '@nestjs/common';
import { ConfigService } from '@nestjs/config';
import { FileFieldsInterceptor } from '@nestjs/platform-express';
import { nanoid } from 'nanoid';
import { setupMulterS3 } from 'src/common/utils/file.util';
@Injectable()
export class S3Service {
private s3: S3Client;
private bucketName: string;
private readonly fileFieldsInterceptor;
constructor(private readonly configService: ConfigService) {
const region = this.configService.get('AWS_REGION');
const accessKeyId = this.configService.get('AWS_ACCESS_KEY_ID');
const secretAccessKey = this.configService.get('AWS_SECRET_ACCESS_KEY');
this.s3 = new S3Client({
region: region,
credentials: {
accessKeyId: accessKeyId,
secretAccessKey: secretAccessKey,
},
});
this.bucketName =
this.configService.get('AWS_S3_BUCKET_NAME') ?? 'default-bucket-name';
if (!this.bucketName) {
throw new Error('AWS S3 Bucket name is undefined.');
}
}
// 파일을 s3버켓에 업로드하는 로직
async uploadFile(
file: Express.Multer.File | undefined,
): Promise<string | undefined> {
if (!file) return undefined;
const body = file.buffer;
const contentType = file.originalname.split('.').pop()?.toLowerCase();
const key = `${nanoid()}.${contentType}`; //nanoid 3.0.0 버전이어야 함
const uploadCommand = new PutObjectCommand({
Bucket: this.bucketName,
Key: key,
Body: body,
ContentType: contentType,
});
const awsRegion = this.configService.get('AWS_REGION');
await this.s3.send(uploadCommand);
return `https://${this.bucketName}.s3.${awsRegion}.amazonaws.com/${key}`;
}
}
3. 이미지 업로드 로직 구현
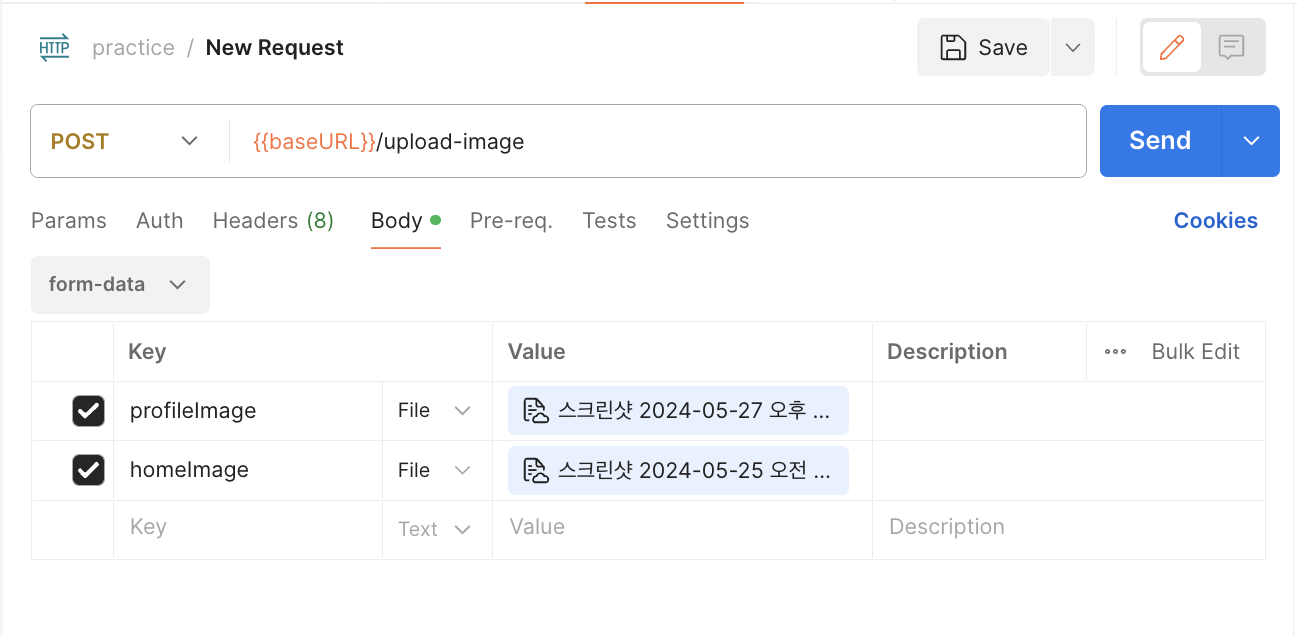
- 두 개의 이미지를 업로드할 계획이다 ( 홈 이미지, 프로필 이미지)
- 코드는 아래와 같다
// schema.prisma

generator client {
  provider = "prisma-client-js"
}

datasource db {
  provider = "postgresql"
  url      = env("DATABASE_URL")
}

model Images {
  id           Int    @id @default(autoincrement())
  profileImage String
  homeImage    String
}
// upload-image.service.ts
import { Injectable, NotFoundException } from '@nestjs/common';
import { PrismaService } from 'src/database/prisma/prisma.service';
@Injectable()
export class UploadImageService {
constructor(private readonly prismaService: PrismaService) {}
async getProfile(id: number) {
const profile = await this.prismaService.images.findUnique({
where: { id: id },
});
if (profile) return profile;
else throw new NotFoundException('프로필을 찾을 수 없습니다.');
}
async createProfile(profileImage?: string | null, homeImage?: string | null) {
const profile = await this.prismaService.images.create({
data: {
homeImage: homeImage,
profileImage: profileImage,
},
});
return profile;
}
}// upload-image.controller.ts
import {
Controller,
Get,
Post,
UploadedFiles,
UseInterceptors,
} from '@nestjs/common';
import { UploadImageService } from './upload-image.service';
import { FileFieldsInterceptor } from '@nestjs/platform-express';
import { S3Service } from 'src/storage/s3.service';
@Controller('upload-image')
export class UploadImageController {
constructor(
private readonly uploadImageService: UploadImageService,
private readonly s3Service: S3Service,
) {}
@Get()
async getProfile(id: number) {
return await this.uploadImageService.getProfile(id);
}
@Post()
@UseInterceptors(
FileFieldsInterceptor([
{ name: 'profileImage', maxCount: 1 },
{ name: 'homeImage', maxCount: 1 },
]),
)
async createProfile(
@UploadedFiles()
files: {
profileImage?: Express.Multer.File[];
homeImage?: Express.Multer.File[];
},
) {
console.log(files);
const { profileImage, homeImage } = {
profileImage: files?.profileImage?.pop(),
homeImage: files?.homeImage.pop(),
};
const [profileImagePath, homeImagePath] = await Promise.all([
this.s3Service.uploadFile(profileImage),
this.s3Service.uploadFile(homeImage),
]);
const profile = await this.uploadImageService.createProfile(
profileImagePath,
homeImagePath,
);
return profile;
}
}
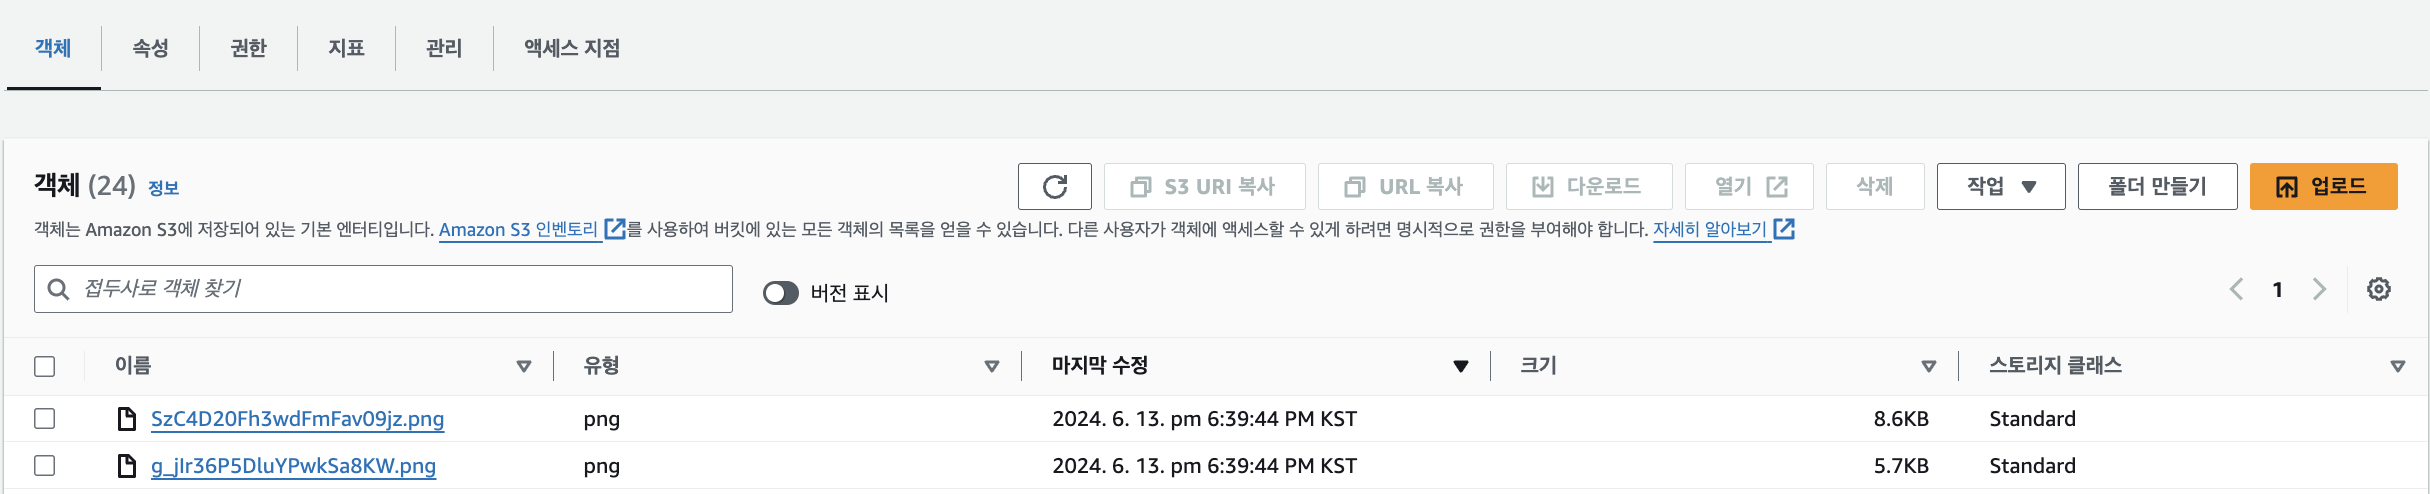
4. 이미지 업로드 후 AWS에서 이미지 확인
- 포스트맨을 통해 테스트
- s3 버켓 확인
'Nest.JS' 카테고리의 다른 글
| [Nest.js] REST API 방식으로 소셜로그인 구현 샘플 코드 (naver, google, kakao) (2) | 2024.10.16 |
|---|---|
| [Nest.js] 프로젝트 초기 설정하는 법 (0) | 2024.09.25 |
| [Nest.js] 라이프사이클 정리 (0) | 2024.09.08 |
| [Nest.js] 페이지네이션 백엔드 구현 (prisma) + 프론트 구현 (0) | 2024.07.04 |
| [Nest.js] 카카오 로그인 API (회원가입, 로그인, 카카오 프로필 가져오기) (0) | 2024.06.23 |


